
Flying through Eichenwalde, you will soon find that Blizzard has made a few different choices in their design of it. Eichenwalde does not feature a new gamemode, sticking to arguable the best one so far (Hybrid), but it does showcase more verticality than any other map released before. Secondly, the bridge leading up to the final, indoors, portion of the map creates a valuable choking opportunity for the defending team, with death pits on either side of the bridge to abuse.
Waiting for Eichenwalde to be available in competitive play, we flew through the map and highlighted 7 spots that we feel will become especially important in the strategies and counter-strategies of pro teams:
(These areas are listed in order of how the attacking team encounters them.)
1. First Choke Point
First on our list is this specific POV at the first chokepoint of the map. As seen on most other maps, pro teams do not try to delay the offense from the very first meters of the map. They will prefer to set up at a point that provides them as much of an advantage as they can get. In Eichenwalde's case, thats the first gateway only two corners away from Offense's spawn. This POV has an eye on two out of the three routes that Offense can take to get to the gateway (excluding through the sky) and is in our opinion the perfect location to place a Junkrat or a cheeky Mei.
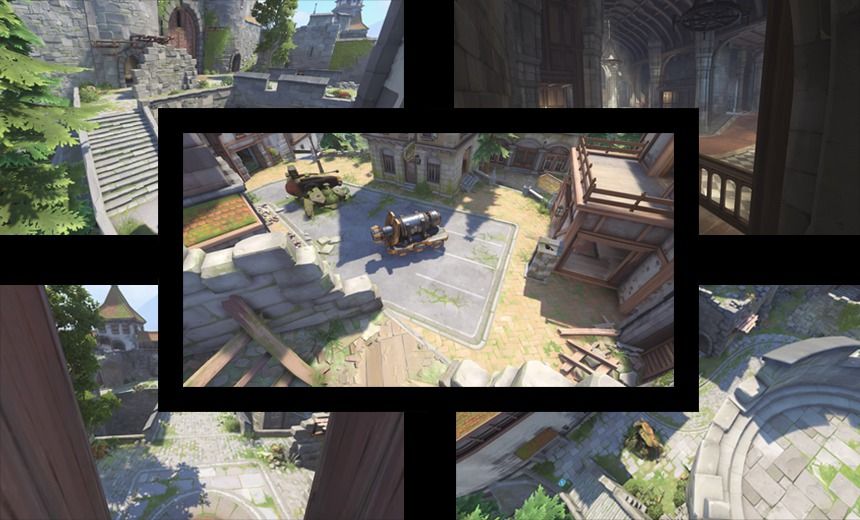
2. Crossfire Defense
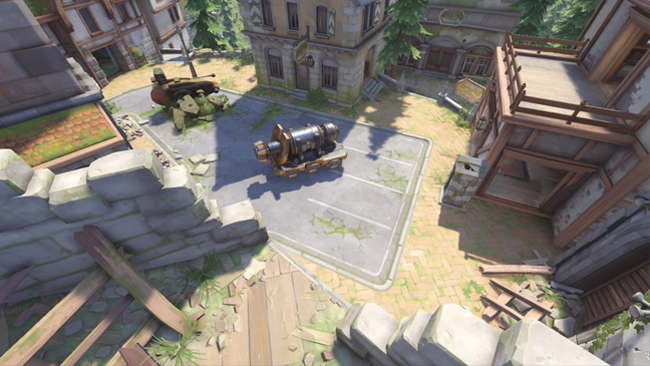
Pictured above is the actual capture point that functions as the start of the payload. This POV shows two separate higher-ground positions where turrets/bastions/snipers can be placed. The right one is available to all heroes, through a handy staircase, while the bottom left one requires some kind of mobility skill (or a Mei wall). The bottom left spot does have one clear advantage however: it is shielded off by that wall on the left and thus can only be shot at from a very specific and vulnerable angle (again not considering the sky). We would like to compare this point to Numbani's, but it is significantly different as well.
3. Ready for the drop
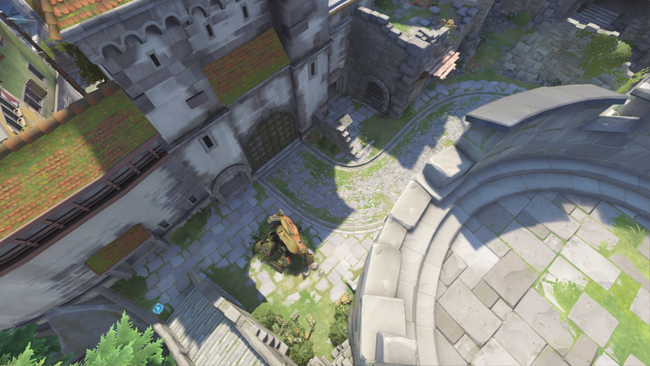
If you frequently watch pro matches, you will have seen the tendency of teams on defense to try to flank their opponents. Offense is, after all, the best defense. Shown on the bottom right of this picture is one of the watchtowers of the castle that can be accessed by all heroes. Considering the gate through which the payload will have to go, this point could provide a valuable opportunity for defense to jump down as a team and overwhelm their opponents through surprise. This point could also act as a primary spot for Widowmaker or Hanzo to delay the push, but we expect that flankers like Genji or Tracer will be able to counter that tactic from the get-go.
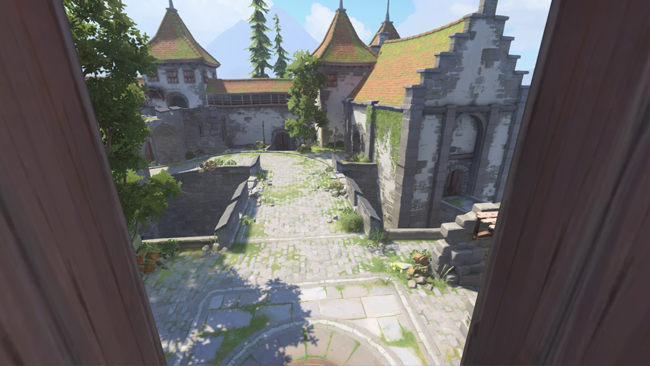
4. Flank around the bridge
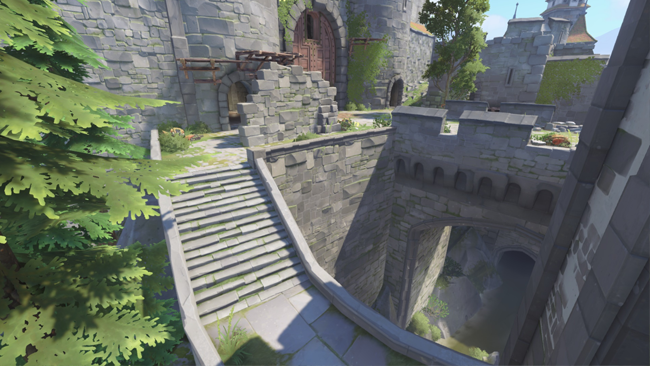
As mentioned in the introduction, the bridge shown in the top right part of this image is a crucial chokepoint for the defense. Considering the payload has to be pushed over it, and how narrow the bridge is, this overpass might not be the safest spot for most areas. Luckily, Blizzard created a separate route to the side of it that can either be used by the entire team or just a few flankers to create the necessary space required to reach the checkpoint right before the large gate. Defense only really has three exits from the indoors area and all three can be observed from this point.
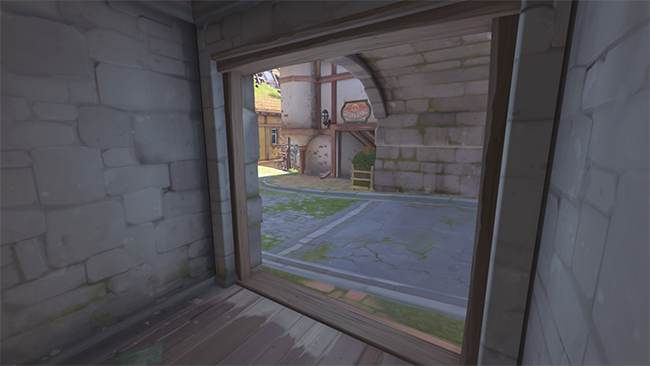
5. Sentry point
This POV is also shown on the fourth image on this list and could possibly be a direct counter to it. It is a very vulnerable position, but with a lot of information available for those brave or skilled enough to make use of it. We expect this spot to see a lot of play right when the payload turns the corner, to keep note of any flanking attempts, but it will have to be abandoned as soon as the attacking team starts the straight route on the bridge.
6. Final push over the finish line
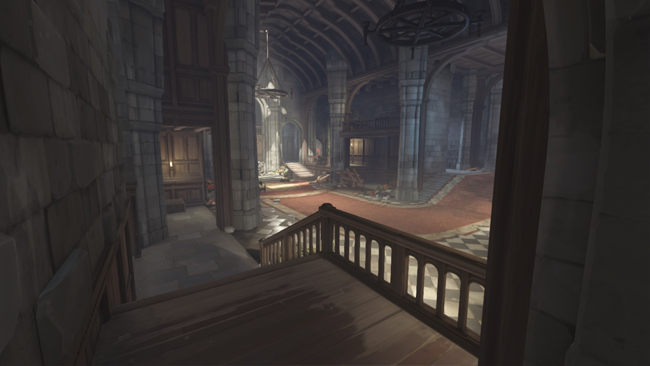
This view showcases the exit of one of two flanking routes that are possible in this final stage of the map. This final area reminds us a lot of King's Row, but has a lower ceiling which is very significant. What it does feature is two (minor) flanking routes that allow some Tracer and Genji harassment.
What do you think about these specific spots? Did we miss any that are going to be even more important? Let us know in the comments or on Twitter!
7. Sit back here, Ana
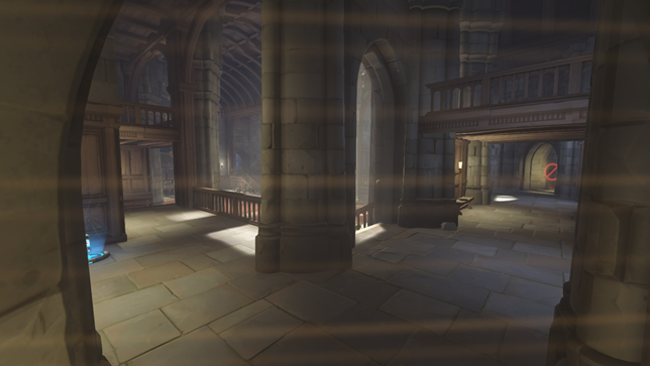
With a heavy defense, a Mercy and Ana can provide huge sustain to the forces in the main area for the last point at the feet of Balderich. Ana can be in the left defensive spawn hall and shoot onto the point and throw healing grenades from behind the "do not enter" barrier. A Junkrat on the top left ledge can spam down grenades, and thus either Junkrat or Ana can provide a quick escape from a graviton for Mercy. When required, she can then fly back in for the resurrection.
For more competitive Overwatch news, follow @GosuOverwatch.