
The Soul Reaper is born in the depths of Hell itself and has risen to the surface on a mission to capture the souls of Newerth. With the authority to instantly judge those he comes in contact with, even the strongest of the Legion wither when he approaches.
Base Attack
Attack Type: RangedAttack Damage: 44-48
Attack Range: 600
Attack/Sec: .68
Detailed Attributes
Movement Speed: 290
Strength per level: 1.7
Agility per level: 1.7
Intelligence per level: 2.5
Defense Information
Armor: 1.1
Dmg. Reduction: 6%
Magic Armor: 5.5
Magic Reduction: 25%
| Table of Contents | ||||||||||||||||||||||||
| Introduction | ||||||||||||||||||||||||
| Spells | ||||||||||||||||||||||||
| Laning and Gameplay | ||||||||||||||||||||||||
| Skill build | ||||||||||||||||||||||||
| Items | ||||||||||||||||||||||||
| Tips | ||||||||||||||||||||||||
Primary Attribute: Intelligence
Role: Semi-Carry / Carry / Counter-Ganker / "Tank"
Strength: 16
Agility: 16
Intelligence: 22
Soul Reaper
Soul Reaper is a hero that people instantly recognize for his infamous "Less than 50% HP and you're dead" ultimate. He also has a fairly battle-changing heal skill, which can also damage enemies for the same amount, an aura which slowly kills any enemy or creep near him, as well as a skill which assists in his farming, by almost allowing him to never run out of mana. Despite all this, he is often misplaced in teams as a support and thus will normally underperform, which makes people feel he is rather weak. However, if played well, Soul Reaper is easily able to withstand the damage from a long battle without breaking too much of a sweat.
Cooldown: 1.0 Seconds
Passive Aura
700 / 800 / 900 / 1000 Radius
Enemies in the radius are damaged for 0.4% / 0.6% / 0.8% / 1.0% of their max Health per second.
On use, turns off the aura.
Strategy: When laning, try to stay in the area for passive harassment. When a low HP hero gets away, follow him and there is a good chance to kill him passively if he stays in your AoE. You can also use this skill early in the game to kill Ancients without having to hit them. Turn off the aura if you're invisible and wish to sneak up on an enemy hero. With buff icons so big, it becomes obvious you're there otherwise.
 Inhuman NatureThe Soul Reaper feeds on failure, and his power grows when those he judges fall. Each death he reaps replenishes his store of mana.
Passive Ability
On Kill: Regains 12 / 24 / 36 / 48 mana.
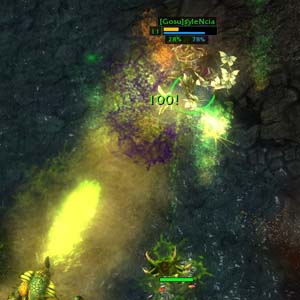
Strategy: By the time you reach Level 10, if you have maxed this skill out, lane creeps will spawn about 5 at a time. If you kill each of these creeps with one Judgment, you can regain more mana than the Judgment cost. Denying creeps also gives you mana.
 Demonic Execution
The Soul Reaper summons a Demonic Execution against the target, stunning and dealing damage based on how close to death they are.Soul Reaper is a hero that people instantly recognize for his infamous "Less than 50% HP and you're dead" ultimate. He also has a fairly battle-changing heal skill, which can also damage enemies for the same amount, an aura which slowly kills any enemy or creep near him, as well as a skill which assists in his farming, by almost allowing him to never run out of mana. Despite all this, he is often misplaced in teams as a support and thus will normally underperform, which makes people feel he is rather weak. However, if played well, Soul Reaper is easily able to withstand the damage from a long battle without breaking too much of a sweat.
Soul Reaper's Role
Soul Reaper is generally confused as a support as people see that he has a heal, and is thus a support. This is not the case. Unlike support heroes, Soul Reaper's abilities were designed with the thought of staying in battle for an extended period of time. However, if a Soul Reaper is given no farm, he cannot provide anything to the team, and is less useful in a team fight as he has no stun (other than a costly ultimate), and would die as fast as a Glacius would. For babysitting a lane because he has a heal, it is the most inefficient heal of the heroes that have a non-ultimate heal. Check the table below:
Not only does Soul Repaer have one of the highest Mana Costs (% wise), he also heals a ridiculously small amount. While the damage is AoE, the primary concern is about the babysitting potential, in which Soul Reaper performs poorly. On the other hand, the damage potential of the skill becomes rather high in comparison, doing about double the damage than heal. At level 7 onwards, Soul Reaper is able to farm extremely easily using his Judgment skill, and later to almost no cost, thanks to his Inhuman Nature. This means he can stay in a lane to farm for as long as he needs to without worrying about running out of mana. Another thing to point out is his amazing scaling into late game. Soul Reaper possesses not just one, but two scaling skills, meaning they will be at their peak at all times of the game, which is particularly important for (semi-)carries. His Withering Presence skill will drain HP at the same from every enemy in range of Soul Reaper, making them even easier to take down. Finally his ultimate is able to take down heroes before they can do anything devastating to the team, and it can be done at about the same HP % level for any hero at nearly every point in the game, making it extremely versatile. The role of the "tank" is also noted because he fits the description of being an aggression director, as it would be many times more difficult to take down other heroes before taking down Soul Reaper. Later on in the game, he will also be able to soak up quite a bit of damage, while still dishing out a lot of damage to the opponents. This guide will be promoting the use of Soul Reaper as a semi-carry and/or carry, as a support Soul Reaper is extremely inefficient.
No hero is without blemish. All who face the Soul Reaper face their every regret. Every harrowing moment spent in the Soul Reaper's presence damages those forced to endure it.Soul Reaper is generally confused as a support as people see that he has a heal, and is thus a support. This is not the case. Unlike support heroes, Soul Reaper's abilities were designed with the thought of staying in battle for an extended period of time. However, if a Soul Reaper is given no farm, he cannot provide anything to the team, and is less useful in a team fight as he has no stun (other than a costly ultimate), and would die as fast as a Glacius would. For babysitting a lane because he has a heal, it is the most inefficient heal of the heroes that have a non-ultimate heal. Check the table below:
| Heroes and their Heals at LV1 | ||||||||||||||||||||||||
| Hero | Max Mana | Mana Cost | % of Max | Heals For | Heal per 1% Mana | |||||||||||||||||||
| Accursed | 273 | 75 | 27.5% | 100 (Single) | 3.64 | |||||||||||||||||||
| Demented Shaman | 312 | 80 | 25.6% | 80 (3 Targets) | 3.12 | |||||||||||||||||||
| Nymphora | 325 | 80 | 24.6% | 60 (AoE) | 2.44 | |||||||||||||||||||
| Voodoo Jester | 286 | 110 | 38.5% | 80 (AoE) | 2.08 | |||||||||||||||||||
| Jeraziah | 221 | 100 | 45.2% | 90 (Single) | 1.99 | |||||||||||||||||||
| Soul Reaper | 286 | 125 | 43.7% | 50 (AoE) | 1.14 | |||||||||||||||||||
Not only does Soul Repaer have one of the highest Mana Costs (% wise), he also heals a ridiculously small amount. While the damage is AoE, the primary concern is about the babysitting potential, in which Soul Reaper performs poorly. On the other hand, the damage potential of the skill becomes rather high in comparison, doing about double the damage than heal. At level 7 onwards, Soul Reaper is able to farm extremely easily using his Judgment skill, and later to almost no cost, thanks to his Inhuman Nature. This means he can stay in a lane to farm for as long as he needs to without worrying about running out of mana. Another thing to point out is his amazing scaling into late game. Soul Reaper possesses not just one, but two scaling skills, meaning they will be at their peak at all times of the game, which is particularly important for (semi-)carries. His Withering Presence skill will drain HP at the same from every enemy in range of Soul Reaper, making them even easier to take down. Finally his ultimate is able to take down heroes before they can do anything devastating to the team, and it can be done at about the same HP % level for any hero at nearly every point in the game, making it extremely versatile. The role of the "tank" is also noted because he fits the description of being an aggression director, as it would be many times more difficult to take down other heroes before taking down Soul Reaper. Later on in the game, he will also be able to soak up quite a bit of damage, while still dishing out a lot of damage to the opponents. This guide will be promoting the use of Soul Reaper as a semi-carry and/or carry, as a support Soul Reaper is extremely inefficient.
Cooldown: 1.0 Seconds
Passive Aura
700 / 800 / 900 / 1000 Radius
Enemies in the radius are damaged for 0.4% / 0.6% / 0.8% / 1.0% of their max Health per second.
On use, turns off the aura.
Strategy: When laning, try to stay in the area for passive harassment. When a low HP hero gets away, follow him and there is a good chance to kill him passively if he stays in your AoE. You can also use this skill early in the game to kill Ancients without having to hit them. Turn off the aura if you're invisible and wish to sneak up on an enemy hero. With buff icons so big, it becomes obvious you're there otherwise.
Passive Ability
On Kill: Regains 12 / 24 / 36 / 48 mana.
Strategy: By the time you reach Level 10, if you have maxed this skill out, lane creeps will spawn about 5 at a time. If you kill each of these creeps with one Judgment, you can regain more mana than the Judgment cost. Denying creeps also gives you mana.
Range: 600
Cast Time: 1.0 Seconds
Mana Cost: 175 / 340 / 500
Cooldown: 100 (70) / 85 (70) / 70 (70) Seconds
Activation
The amount of Health the target is missing is multiplied by 0.4 (0.6) / 0.6 (0.9) / 0.9 (1.2). Magic damage is dealt to the target equal to this amount. Stuns for 1.5 seconds.
This ability can be boosted by Staff of the Master. Upgraded values are in brackets.
Strategy: Assuming no extra Magic Resistance, the amount of HP required to kill are as follows: 23.077% / 31.034% / 40.299% / 47.368%. If a target is teleporting away, use your ultimate to stop him, even if it doesn't kill him, if you are sure you can kill him using your other skills or if you have backup.
While Soul Reaper is a hero you want levels on, so that he can push more damage on the other team, he is relatively squishy, and would get dominated in the middle lane a lot of the time. Thus, a side lane is preferable with a less item dependent hero as a lane partner. Soul Reaper does not exactly shine in a trilane, and would be much better suited for the solo side lane in that case instead, if the player is capable of doing so. In that case, solo laning the horizontal lane allows for tower hugging, and creep pulling, making the job of farming easier. If you go in the vertical lane, you will have access to Ancient Creep stacking, which will allow you to make use of the Ancient Killing build.
Potential Laning Partners


Laning Phase
Early on, focus on getting last hits, but stay within AoE of your aura to slightly whittle them down. It's a minor point, but by harassing them along with the aura, you should control the lane nicely with your lane partner. Aim for some early items, towers and kills aren't as important, as you're gearing up for early clashes which will give your team the upper hand. If you can get either one though, it is always a bonus. Try not to roam around too much, as you're not able to do much anyways because you're slower than most heroes, and so you'd miss out on the ganking action.
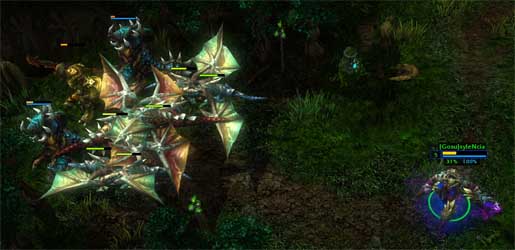
Mid-Game
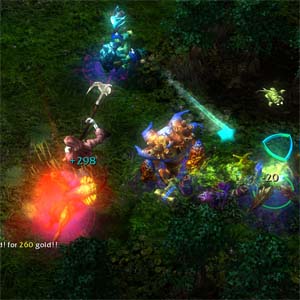
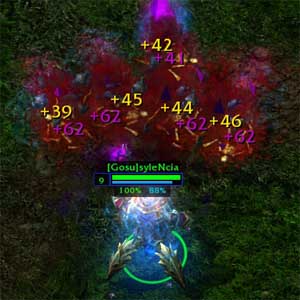
At this point, you should be decently geared, and be able to push out any lanes with your Judgment easily. In clashes, you will probably have limited mana in terms of spamming, so use Astrolabe if you have it first, since it's cheaper and provides armor bonuses too, then see what happens next. If your team isn't winning at this point, just try to get the tankiness up, but let any other hard carries have priority in lane. In that case, just ancient stack. Note that even if you are ganked, you should be able to live to the point your allies can reach you. For example in the picture above you have been ganked by a Bombardier, Sand Wraith and Nymphora but have managed to live through it all.
Late Game
By this point in the game, you should have about 70% damage reduction and 55% magic reduction, along with some magic absorption from Barrier Idol. Coupled with this you'll have insane amounts of regeneration and extra abilities (eg. Hex and Slow) and your team should be getting healed for at least 500-700 health each in the battle. That gives the team another hero's worth of health to take down, which isn't an easy feat. If your team is in a bad situation, the best you can do is stay at the tower and duke it out there. The same thing will happen with heals and whatnot, but it'll be a hard earned victory if it comes through. Also, make sure you target the biggest threat with your ultimate, not just any support with low HP. They should be food by this stage in the game and thus the ultimate would be the biggest waste.
 Inhuman Nature Inhuman Nature Inhuman Nature
 Demonic Execution
 Withering Presence Withering Presence Withering Presence
 Stats Demonic Execution
Level 1 Judgment is extremely average as a skill, and the early harass and perhaps lucky extra creep kill never hurts at level 1. Judgment is maxed for obvious reasons, followed by Inhuman Nature in order to give yourself a lot more counter-pushing and farm power. Withering Presence is maxed out after that as it is the only skill left. The images on the right represent what I build.
Inhuman Nature vs Withering Presence
Many people choose to go for Withering Presence before getting Inhuman Nature because they believe the passive aura will outharass the opponent. Sometimes it's true, when facing a full ranged team, it's often difficult to harass them easily without getting harassed back just as easily. Thus, the % damage slowly kills them, and is essentially you 'auto-attacking' them from a greater distance. However, even in these games, and in every other game that doesn't feature 5 ranged, by using Inhuman Nature to kill creeps and damage them while they try to last hit, you're going to be able to do it more often, you'll be doing a lot more damage quickly, and the effects are immediate enough to drive them back. Other factors should also be considered. If you find yourself solo against a melee hero, and you're last hitting fine without having to use any spells, the aura is probably better to level. Some people consider a Blood Chalice to be a good replacement for having any mana issues too, but the regeneration becomes too low extremely quickly.
Ancient Stacking Build
For ancient stacking, max out your Withering Presence as soon as possible, then Judgment, then Inhuman Nature (Ultimate whenever possible). Start stacking as soon as you can, and you can start going at them at level 3 or 5. If you get your last pull off at Level 3, it's worth starting then, and letting your lane partner get some extra levels. You will catch up once you silently kill the ancients. Also, when they are nearly dead, try pulling them out of their camp so they don't block the next set of Ancients from spawning.
Starting items
Normal Build
4x
 1x
1x 2x
2x
Ancient Stack Build
3x
1x 1x 1x
1x 1x
Alternate Builds
1x
 1x
1x 1x 1x 2x
This one is for the people who wish to get Blood Chalice on Soul Reaper.
3x
2x 1x 1x
1x 1xSimilar to above, but if a courier is already bought, you can go with this instead.
Note: While you may buy the initial courier and wards, it should not be expected of you to continue the supporter's role unless your team is that heavily carry oriented that you're the only thing close to a support.
First Items to get


Ring of the Teacher provides extremely cheap armor for the team, which is great, as well as decent mana regen for the people around you too. Steamboots are most viable on Soul Reaper as he can switch between Strength when harassed and Intelligence boots when needing more mana. Later on, it can be set on either. Astrolabe will provide the team with extra health in team fights, it has a good buildup, provides even more armor, and helps you stay alive longer wherever you are.
Mid-Game Items

A must have.

A good pickup against magic teams. Once you get this, a Barrier Idol can follow directly after unless you need a Helm as well.

Against a team with physical damage, this is the perfect item. Even against teams that don't lean towards the physical damage side, it is still a great item as it gives you some extra health which Soul Reaper sorely lacks at this point in the game.

If you went the ancient stacking build, you will probably have the gold to get this quickly. Otherwise, it's an expensive investment that may not be that fruitful.

A barrier idol is great for pushing towers, giving the team some extra beef while fighting and pushing a tower. If you get a Shaman's Headdress, turn it into a Barrier before moving into late game items in most games.

Level 3 Spellshards will essentially do the same thing as a Staff of the Master, assuming they don't have more Magic Armor than it reduces it by. In fact, at level 16, Level 3 Spellshards would give you the same damage on your ult, as well as having better cooldown and damage on everything else, making Staff of the Master unneeded.
Late Game Items

Provides you with a lot of armor, and a lot of mana meaning you can spam out your spells even more while preventing them from running away.
Against a high DPS hero such as Chronos, Kuldra's will give you enough time for the team to dish out the pain then letting you take him down before anything horrid happens. Also works wonders against heroes running away with its long cast range and long duration.

If you found that your armor wasn't high enough. Take it to the next level by building a Breastplate which would probably be better only if you didn't get the Frostfield Plate, as the armor increase would have only a small increase in damage reduction, making it a waste of money, though your team will love you.

Even more cooldown reduction, though probably unneeded, but it provides you with a lot of health, making you the biggest pain to take down. If the game lasts that long, you'll be needing it.
Situational Items

If you think you're having mana problems. In most cases, it is unneeded because Blood Chalice doesn't give you enough to even heal once if you're running empty, the amount you heal is less than what it takes, you shouldn't be spamming Judgment anyways. When you do get around to it, you should have the mana you need through Inhuman Nature. If you decide to go on the aura instead, this is a situational pickup.

If their team are full of single targets, you may want to consider this as it provides decent regen and stats.

If they're that magic heavy, Shrunken is probably required.
Rejected Items

This item costs 4300 and provides minimal improvement to your ultimate. 7% extra damage comes out to be 140 extra damage on a 2000HP hero, which is extremely lackluster for the cost. Spellshards, while at level 3 being more expensive, provides immediate benefits to your ultimate and everything else overall, meaning if you wished to purchase an item that boosted his ultimate, Spellshards would be the better option.
Tips For Soul Reaper
Soul Reaper doesn't feature many hidden nuances to play around with, but there are a few hints that can be given.
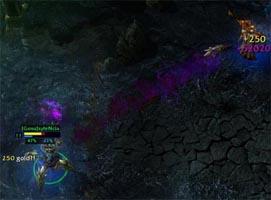
Tip 1: Withered Death
When chasing an enemy hero in the later game, especially if Withering Presence is maxed, then you do not necessarily have to be able to see the enemy to kill them. If safe to do so, chase them around and if you give it a bit of time (assuming you were correct in your follow), then you should net a free kill.
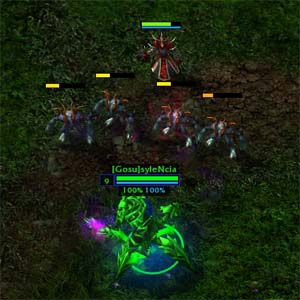
Tip 2: Ult to stun, not kill.

Sometimes the enemy might not be in your reach to get that last autoattack that would give you a kill on your ultimate. However, most players forget that it's entirely ok to ultimate for the stun, then attack for the kill - for example to the right. Care must be taken that you will get the kill, or a team mate gets the kill though, as a wasted ultimate will make you much weaker in teamfights that happen during the cooldown period. That does not mean to say, however, that you are useless without your ultimate, just that you are much for potent with it - though that should be fairly obvious.
Tip 3: The Early Ancients
In the case your team can support your actions, it is possible to farm your way to items using only your Withering Presence on Ancient camps. In general, it is best to start at level 3 or level 5, but can be done as early as level 1 - though the time taken would most likely be too large to be considered good farming. In this method of farming, you simply need to stand next to the ancients and watch them die. To make things more efficient, you should pull the Ancients at the 53 second mark, and the creeps will stack, giving you gold at a much faster pace. Using this method can get you a lot of gold fast (especially with the Dragons) but can cause team mates to become angry at you if not warned ahead of time, so always remember to notify your lane partner, or would be lane partner when the game starts.
Tip 4: Judge them all.
For the first 35 or so minutes of the game, the creeps will be at a level that you can systematically take out all the creeps in a wave at once. Without considering your allied creep hits and aura, the method is to hit the ranged creep once, and each melee creep must take the 3 to 4 hits, depending on the damage you have at the time. As creeps have no magic armor, you can easily check when they are below the threshold by clicking on them and seeing if they are below 275 HP. This is assuming you have Level 4 Judgment. By taking out all the creeps in one shot, you are providing yourself with maximum farm, and allowing no room for creeps to take an enemy creep or 2 because you casted Judgment while the creeps were at full health. In addition, it becomes very hard, or impossible if you do it perfectly, for any enemies who are laning against you to get any denies off, as 275 is above the deny threshold.
Comments will only be allowed if they are directly relevant to the actual strategy in the article.